Pages

2.20.2014

It's Been a While

I haven’t blogged in well over a year due to a lot of things.  I had a new job, felt like I didn’t have time to do many new projects, etc.  I kept telling myself that I would blog again, but before I knew it, time had passed and here we are.  Lots of things have changed since my last blog post – our son was born! Yup, I was pregnant and had our little boy in November 2013.  I’m a little hesitant blogging about all the details and about our little boy because I’m such a private person.  I don’t like putting intimate details online because I’m not so trusting.  So even though he’s the most important thing in my life, I think I’ll keep this blog strictly home projects and keep my family life out of it – for the time being, anyway.

We (well, Tim not so much, but I am!) are so excited to tackle more home projects this spring and summer once all of this snow melts. So far, our snow totals have been highest in all the state and Spring cannot come soon enough.

Here’s what we’re hoping to complete:

Downstairs

-Kitchen – paint the ceiling, walls, and cabinets and add new hardware
-Office – paint
-Bathroom/Laundry room makeover – paint, install new toilet and vanity, add storage
-Sunroom – install new flooring and paint

Upstairs

-Bathroom – paint, install flooring, new vanity, and toilet

In addition, we hope to paint our wood trim and doors in the entire house
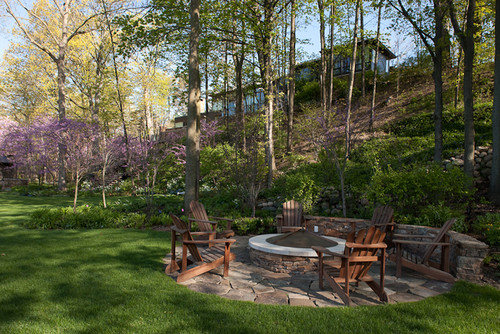
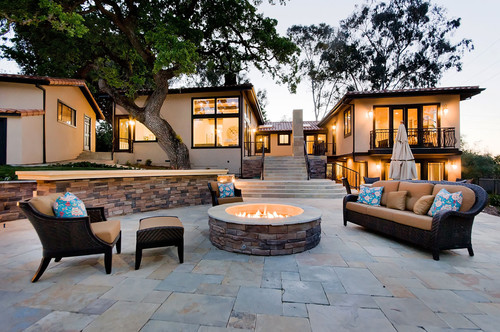
Outside

-repaint farmer’s porch
-install stone patio and fire pit

-fix up the back deck

7.31.2012

Victorian Chair Makeover

A few months ago my MIL brought over a victorian chair that she had in storage.  While I was cleaning it, the top part fell off and shattered on the floor.  I was originally planning on keeping the chair natural, but since I had to piece it back together with wood glue and putty, I decided I should probably paint.


When the wood glue and putty dried, I lightly sanded to even out the texture of the chair.  I didn't prime before spraypainting (I used Valspar's Exotic Sea Gloss) because I didn't mind if some of the wood coloring of the chair seeped through for a more antique look.

The cushion was full of hay and wool and was fastened to the wooden seat with rusty nails, which definitely had to go.  I padded the wooden seat with couple of foam chair cushions from Ikea that I cut to size and stapled a heavy batting over it.  I then cut the fabric to size and used my upholstery gun to finish off the seat.


How cute is the rose detailing?!


7.30.2012

Taking the Hot Tub Out of the Sunroom

This past weekend my dreams came true - the hot tub was removed from the sunroom all in one piece even if it meant taking apart the room.  As you can see from this previous post, we never used the hot tub or the sunroom so it was wasted space in our house.

In less than four hours, Tim's dad, along with his contractor friend, and Tim tackled taking down a wall, moving the hot tub out, and putting the wall back up.  Here's how it went down:

The windows, interior panels, and side of the house including siding came off:


 The hot tub was lifted onto wheels and rolled down a DIY ramp system:


After the hot tub was removed from the room, everything was quickly put back together and the room now looks like this:


The next step is to replace the flooring, paint, and add bead-board onto the ceiling.

7.26.2012

Getting Rid of the Pool & Dream Patio Plans

Last summer we opened our pool and didn't use it at all, so this past Spring we got rid of it.  We posted an ad on craigslist and got a ton of responses with offers before people even saw the pool.  We wanted it gone fast because we didn't want to waste our money on chemicals to open and maintain the pool and let's face it, we couldn't leave it looking like this all summer:

View of the pool from our deck

The guy we ended up selling the pool to had taken down and put up pools in the past which definitely was a plus because we had no idea where to begin.  So on one Spring Sunday, Tim and his dad, along with the pool purchaser dismantled the pool.  This is what our backyard currently looks like:


Currently, our bare area in the back yard is being used as a giant litterbox by neighborhood cats.  Yup, I'm totally serious.  One night when we were admiring our pool-less yard, we spotted three cats in there at the same time.  Our future plans for this space include a stone patio with built-in fire pit, which we will most likely do ourselves to cut down on costs.  Some inspiration photos:


7.25.2012

DIY Burlap Pin Cushion Board

When we moved in, the prior owners left a cork bulletin board above our little desk area in the kitchen.  It wasn't really our style, but we left it there untouched for a while.  Rather than throw it out, I re-purposed it into a large pincushion board that I could hang on the wall in my sewing nook that's currently in progress.

It was super easy to do.  First, using my upholstery gun, I stapled a layer of thick batting onto the bulletin board.

Before 

I cut my burlap, making sure that there was enough room to wrap it over the batting and securely staple it behind the board.  I also glue gunned the corners of the burlap on the back of the board because the staples weren't long enough to go through both the burlap and the batting in the corners.

Here's the finished product!

7.24.2012

Brimfield Finds

As many of you probably know, Brimfield, MA holds three multi-day antique shows each year.  This year, Tim and I met up with my Mom and perused the 5,000+ dealer tents.  We went during a scorching hot 95 degree heat wave, but nothing could keep us from trudging through the fields, searching for a good deal.

I loved the industrial looking lighting, but they were hundreds of dollars.  Maybe a DIY project in the future?


This burlap lighting would be fun and simple to make.


 And the only use for these that I could think of were futuristic looking small dog/cat houses...


I ended up leaving with a ton of inspiration for future projects and with a Sunkist grapefruit box for $10.  I discovered that once we got the box home, the little bit of paper that was left on the box fell off, so I applied a coat of modge podge under and over the paper to preserve it on the box.


I also left with an old key for $2.  I love the heart detailing.


Not a bad day! Who's going to the show in September?

7.23.2012

New Outdoor Lighting

A while back, like seven months ago, we picked up two outdoor sconces that I was originally thinking of using above our fireplace.  They didn't quite look right in that spot, so we figured we would use them as our new front lights to spruce up the front of our house since the original lights were builder grade and in serious need of replacing.

We loved them so much that we recently went back to Lowe's and bought three more for the back deck, and on the two doors on the side of the garage. For under $25 a light, it's definitely a steal!  Here's a quick before and after of just the front light swap.  If you're wondering, they are the Portfolio Rust Outdoor Wall Light.

Before:


After:

Deck light


Related Posts Plugin for WordPress, Blogger...